Showing posts with label Recipes. Show all posts

Thursday, July 24, 2014

Squash Lasagna

My squash bounty continues and I will not cave to the guilt of waste! 

 I'm having a momentary vision of Lucy and Ethel shoving those chocolates in their mouths as fast as the conveyor belt brought them.  That's kind of how I feel with the squash....


 The squash is coming so fast.  I have given squash to all my neighbors til they don't want anymore.  (Husband yells from other room, "don't plant so much next time", DAH).  Come winter when I pull many of these recipe renditions from the freeze I will again dream of planting squash in my garden.


 Who doesn't love ooey, gooey, yummy lasagna?  

I've never met that person and quite frankly I'd think something must be wrong with them.  Chances are, if there is that person,  it might be because of the pasta in the traditional rendition.  Many folks these days are staying away from pasta.
How about lasagna, sans the pasta?  

It can't be done you say? 

How about replacing the noodles with SQUASH.  

WHAT?  


I saw many renditions of this on the internet. Why not give it a try?
I am here to tell you it is yummy.
I am not going to share a complete lasagna recipe with you.  I'm only going to share the basic premise...

slice the squash about 1/4" thick and cook it until it's pliable.  Most of the recipes called for boiling it.  I LOVE everything roasted.  I think it brings out so much more developed flavors.  So, I tossed it with olive oil and sea salt.  Placed it on a cookie sheet in a 400 degree oven and roasted it until it was soft but still holding shape.  
Now your ready to create your dish.  

Layer it in place of the pasta just as you would your favorite lasagna recipe, just the same!  

I always finish my lasagna with a layer of Parmesan to create the crust.

You can make this very vegi or add your favorite meat sauce.

I promise, it will NOT disappoint....


Squash Squares

The garden over flowith with squash...

As is familiar to most of you gardeners out there, it starts coming and it comes fast.  We eat it, we gift it, we preserve it, we.....hmmm, what else can I do?


Luckily I have a  recipe from a friend I've stashed away.   I knowI liked it, otherwise I wouldn't have requested the recipe.  


I'm trying to "healthy" up most everything in my life these days so I wanted to trade out the Bisquick for something else.  Don't get me wrong, I have a box of the grand ole gal in my pantry but, these days, if I can I do switch it out for the very stuff it was meant to replace in the beginning...flour, baking powder, salt and shortening.  I wanted to health it up even more and replace some of the white (although I do use only whole grain white flour) for some whole wheat.  So, I did.

 yecch....

I do believe there are certain recipes that are meant to be just as they are.    

Health, it can be argued, is just as dependent on the feeling of happiness as it is the nutrients we consume!


So, revert to the original recipe I did and it is a yummy way to cook the bounty of yellow squash 

3 Cups Squash/zucchini , coarsely grated
1 Cup Bisquick
1/2 Cup onion, chopped fine
1/2 Cup grated cheddar cheese
1/2 teaspoon salt
1/2 teaspoon marjoram, oregano, or combo of Italian Seasonings
dash of pepper
1/2 Cup of oil
4 eggs, beaten (hopefully farm fresh)
2 Tablespoons chopped fresh parsley (I think this is an important ingredient)
1 clove garlic, chopped, minced or grated

Mix eggs, oil and seasonings.  Add all the rest of the ingredients.  Bake at 350 degrees in a greased 9x13 pan for about 40 minutes or until lightly browned.
Cut 1" squares for appetizers or 4" squares for sides.

Oh no, more squash is coming!
More squash recipes too!

Enjoy!

Tuesday, January 28, 2014

Lamb Ribs


I can almost hear those lips smacking...

Who can resist finger lickin, napkin grabbin, fall off the bone, sticky ole ribs?


 All the talk of fabulous food bites for the upcoming Super Bowl got me motivated.

How about something that might, just might, draw the attention away from the big screen for a bit?  


potato skins, chips & dip, wings...how about something different? 


Today I'm sharing a recipe for the yummiest, easiest, most impressive little morsels...EVER

LAMB RIBS!

Think you don't like lamb?  Think again.  I have gained lamb lovers over this recipe time and time again.  I'm convinced anyway, folks that think they don't like lamb have either had a bad preparation or an older sheep.  If you consider yourself a foodie you need to give these a try.  If you want to impress your guests, this will do it, I assure you.


Finding lamb ribs will not be an easy task. I would suggest you find a lamb vendor at a farmers market, they'll have them!  Not only will they have them but lamb ribs are a very economical cut...double bonus!  As is often the case buying direct from farmers, you'll have access to cuts of meat you'd never find in your box stores.  

So enough discussion...Here's the recipe!

Lamb Ribs


ingredients: lamb ribs, spice rub, BBQ sauce


Spice Rub lamb lends itself to so many flavor profiles, Asian with soy and ginger, Mediterranean with coriander and oregano, Mexican with cumin and chili...and always garlic!  If your not feeling very creative Old Bay seasoning works great

your favorite BBQ sauce  I like a honey/molasses/mustard based sauces but I usually create something that marries well with my rub.  I'd recommend one of your ingredients be honey, molasses, syrup or even a jam you have sitting on the shelf.  Again, if your not feeling too inspired, a store bought sauce will do.   It is honestly hard to go wrong.

Remove as much fat as you can from the ribs.
Rub the ribs with dry rub and refrigerate over nite or at least 8 hours


First, we'll cook the meat.  Remove ribs and place on a foil lined baking pan.  Cover and bake at 250 degrees for 1.5 hours.  Sometimes I place them on a rack and place about 1/4 inch any fruit juice (i.e cherry, cranberry, apple, blueberry, grape) in the bottom of the pan and follow the same cooking.  


Next remove the cover and cook for another 1-1.5 hours.
At this point you could place the ribs on a grill but my oven method works great

Next, baste with your sauce every 10-15 minutes  for the next hour.  

Remove from oven.

Do you see the GOOEY?

Voila!

Too easy? 


Printable Recipe


Monday, October 7, 2013

Cinnamon Pickles


Have I said it before?  I love pickles!  This recipe is adapted from a Caswell County, NC neighbor.  I am sure it would rightfully be referred to as, "old timey".

As so often was the case, an old recipe came out of need for preservation or desire not to be wasteful.  This recipe is just that.  You know those cucumbers that stay on the vine just a bit too long?  Either hidden under all the growth, or, more likely with me...I didn't pick it in time.  The seeds are way too developed for your regular pickle recipes...well, here is the answer to your "i don't want to be wasteful" woes.  


I first had these pickles a few years back and fell in love with them immediately.  They're very different. They're crisp and spicy like fall, not from heat but from cinnamon.


The only issue I had with the original recipe was the bright red color which came from red food coloring and red cinnamon heart candy.  If you don't know, you should read up on red food coloring.  An unnecessary additive I choose to stay away from so I didn't use the candy or the food coloring.  The recipe also uses alum (yes, derived from aluminum) and I found some controversial information about it too.  Alum has always been used in pickling to get the crispness. Although controversial, I used it anyway, this time.  It is a tiny amount and I didn't want to alter the character of the pickles...Next time I will try eliminating the alum and see what happens.


The recipe is time consuming but quite easy.  Know that the next few mornings (yes you read that right) you will have a few basic steps.  The important thing to note is starting this today means you won't be actually canning until the 3rd day.  I do love canning but I also know I have to block off the time and kitchen space and I'll bet if you've read this far into this blog you know exactly what I'm saying!


Ingredients:
2 gallons cucumber rings from too big cucs (peel, seed, slice in rings or as I've done half rings)
water
2 C pickling lime
3 C white vinegar
1 teaspoon alum
10 C Sugar
8 sticks cinnamon
1 C cinnamon hearts (if desired)
1 bottle of red food color (if desired)


Soak the cucumber rings, lime, and 8.5 quarts of water for 24 hours. Drain and wash well.  Cover with ice water and soak for 2 hours.  Pour off ice water.


Cover rings with 1 C vinegar, alum, and red food coloring if using and enough water to cover.  Simmer for 2 hours.


Drain and throw away the water.  Heat 2 C vinegar, 2 C water, sugar and cinnamon sticks and candy if using.  Pour the liquid over the rings. For the next 2 mornings, drain the liquid into a pot, bring to a boil and pour back over the cucumber rings.  Keep a lid over the rings to hold heat as long as possible.  On the 3rd day, reheat the liquid and rings together and bring to a boil.

Once you've reached your boil your ready to can these babies!  Put the rings in your hot sterilized jars, cover with liquid to 1/4 " head space.  Put on your sterilized lids and water bath for 20 minutes.  In 8-10 weeks your ready for the unveiling! I didn't miss the red color at all.  When they were first cooking they had a marvelous celery green color I wished had lasted.  The color is much more appetizing to me then the red ever was.  Hope you ENJOY!

Dog Biscuits


The more I know about farming and the food we consume the more engaged I become in sourcing our ingredients.  I'm a stickler about our food  and those choices are the same for all the animals on our farm.  I honestly don't know how it could be otherwise.

My, shall we say, enlightened perspective regarding our food has led to many of our food staples falling under the category, made from scratch.

Any of you that have experienced the shift from....
store bought:homemade in any of your food choices knows...
 it is always for the better.... in so many ways.

Today, our transition from store bought is all about our four legged kids treat...

We have a ritual, as soon as our pups hear the spoon hit the side of the coffee mug, there they are.  It's pretty cute, you can change everything about the moment, the setting, the cookies, the time, it wouldn't matter...the sound does it.  They know, it's morning treat time!

I'm sure those of you with pets can appreciate the journey through expensive food options.  I love our  kids and cost just couldn't be a factor, even on our farm income.  I learned to do with out pedicures some time ago.  I'll find something else to do away with before I feed our kids unidentifiable food!

Meet our Pups!

Isabelle
Earthquake (aka Quake)

Could you resist?
Not quite as photogenic but all personality.


After much searching I finally came up with this recipe,  adapted from one I found on mydogsbreakfast.com.  A really fun blog all about pet treats.  As always, I make a recipe exactly as I find it the first time.  Then an occasional tweak here and there for my taste...or should I say, Izz and Quake's taste?  So, here it is.  Hope your furry friends like them too.  


Ingredients:
1 Cup water
1 egg (farm fresh of course)
5 Cups Buckwheat Flour
1 Cup All Purpose Flour
1/3 Cup Honey (sourced locally)
1/3 Cup Molasses (sourced as locally as possible)
2 Tablespoons Cinnamon
2 Tablespoons Ground Ginger
Rendered Bacon Fat

Place the dry ingredients — buckwheat flour,flour, ginger and cinnamon — into a mixing bowl first and mix together. Then add the wet ingredients, water, honey, molasses and egg.   I used the stand mixer but you could mix by hand. Mix it until it forms a dough ball.  It does roll out easily but be sure to flour your surface well.  I also had some rendered bacon fat on hand so I brushed each cookie.  I cannot say whether it affected the cookie in flavor or texture but it sure sounded like a good idea.  I'll continue to use the bacon fat.  Our dry kibble foods, regardless how good the quality are just that; dry.  In the processing they loose the natural fats.
I like mine a bit thicker,  1/4″ and 1/2″ thick. I used a bone shaped cookie cutter for maximum affect.


Bake at 250 degrees for 45 minutes to an hour.  Viola, a treat you can feel mighty proud of.You cannot imagine how good they smelled coming out of the oven.  So much so I had to taste.  At first I thought, a dog treat, really?  Why not, look at the ingredients. Mighty tasty morsels they are, serious.  

The original recipe used all buckwheat flour because the author was after grain free.  I don't believe grains are meant for our canines but ours dogs don't have allergies and the all purpose flour gave the dough just a bit more gluten to work with.  I think you could change that 6 cups to whatever combo you like.  I also think the sky is the limited for flavors and such.  Have fun with it!

I'm even thinking I'll stack a few together, tie them with some pretty ribbon and give them as holiday gifts.  

Wednesday, September 18, 2013

Peaches, Peaches everywhere


I knew if I didn't hurry up with this blog post someone would be saying, "peaches, where did she get peaches this time of year?"  Lordy, lordy where does the time go?  Hopefully I've posted this in time that you can still relate to the abundance of summer peaches and the many yummy possibilities.

So, here is the deal.  I've become addicted to food preservation ideas.  I love having great food available to present at that last minute when you get the word your BFF is dying to see the farm and will come for lunch tomorrow or your husbands family is on the interstate just passing by and would love to come say Hi!  You know those moments. We all have them in some form.

 I love to cook and serving good food is very important to me.   I don't want those moments when an unexpected guest graces our home to be any different.  I might not be the best at making sure the Welcome mat is swept off but rest assured,  I'll serve something to remember.  During the summer when fresh food is abundant and full of flavor I have plenty of opportunity to make and stash those yummy treats.

Over the last couple of years, peaches have been a  star ingredient. The addiction began when the peach vendor next to me at the Durham Farmers Market would have boxes of peaches that couldn't be sold because they weren't perfect so I would gladly take them off their hands for a few dollars.  I gathered some of my favorite jam recipes during that time but today I am here to share my favorite of all surprises...


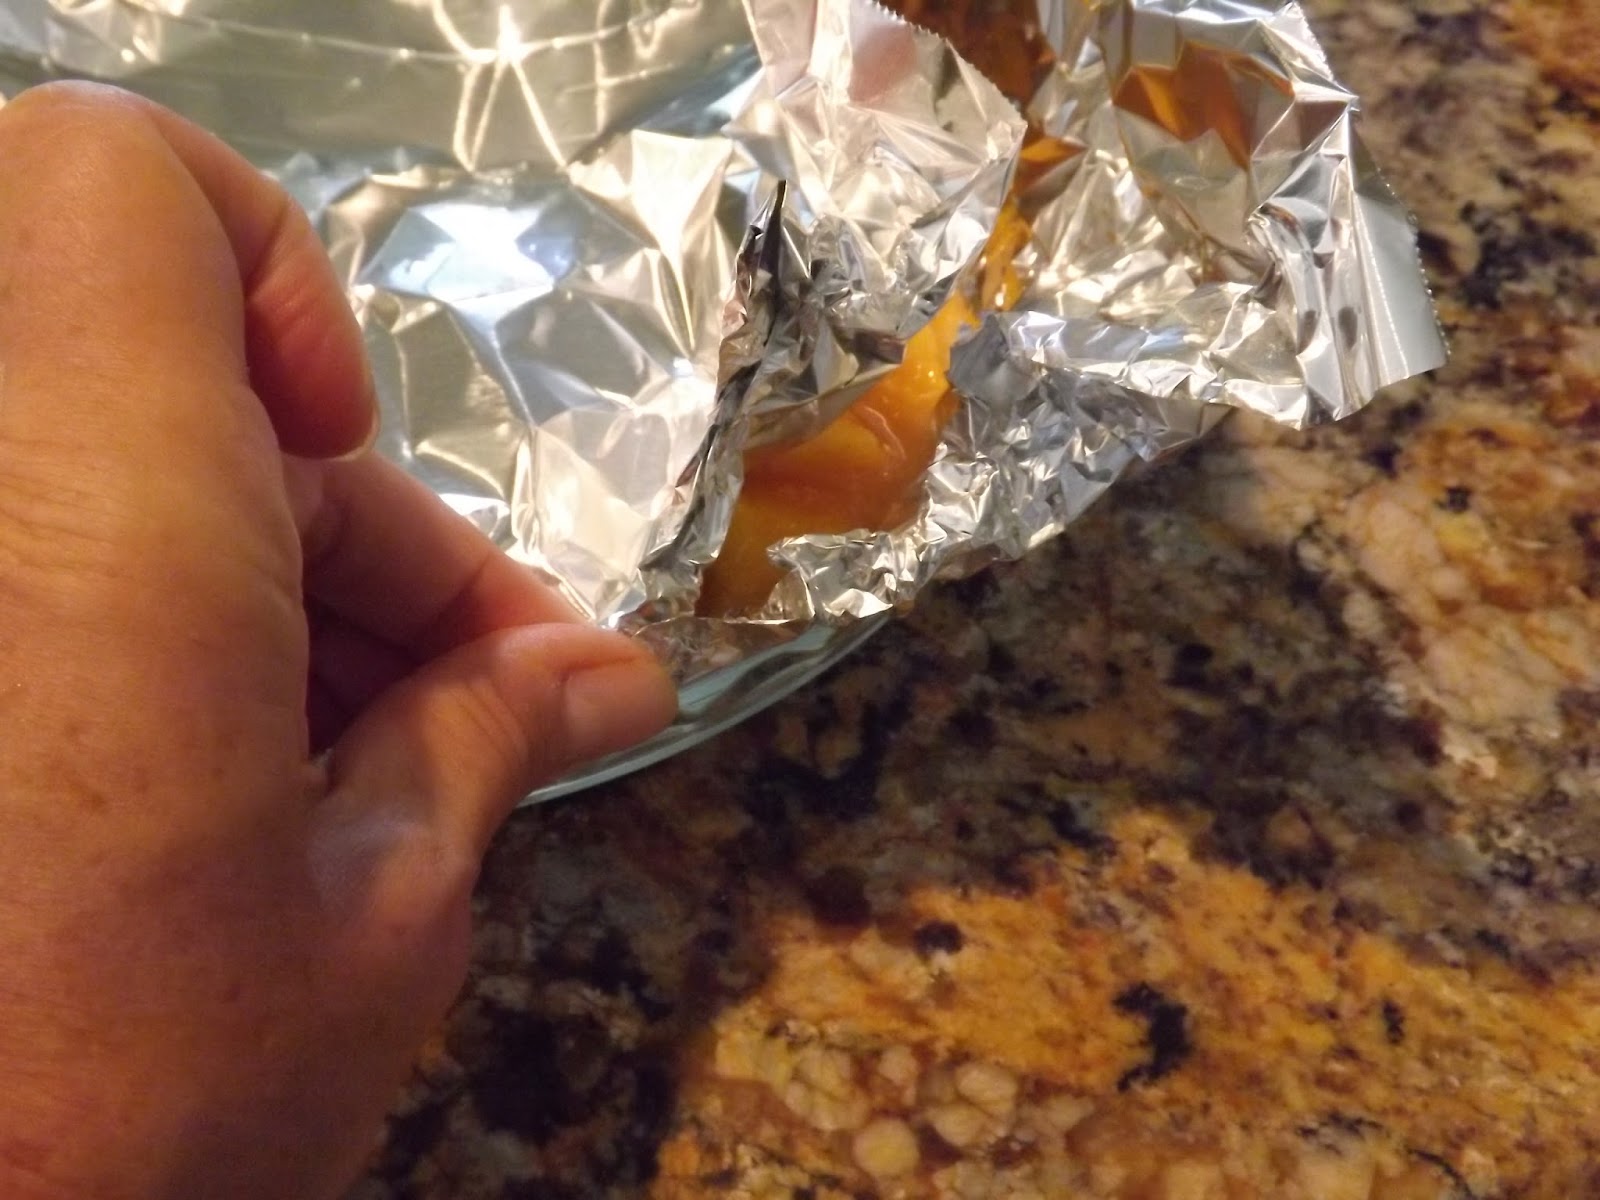
Freezer Peach Pie.  The filling is oh so simple.  You then fill a pie plate lined with foil full of the peach mixture.  Freeze the plate with the peaches.  Then, after it has had time to freeze, you remove the pie plate from the foil and Voila!   You have a frozen peach pie filling ready to rest in the buttery crumb of a freshly made pie crust and baked to perfection just as if you'd freshly peeled and sliced those peach beauties!


5 cups of peeled and sliced fresh Peaches


Mix your cornstarch, Tapioca, sugar and nutmeg and/or cinnamon with peaches


Line pie plate with foil, crossing layers opposite directions


Add peach mixture


Crimp foil together going all around to be sure you have a tight seal


After the foil is sealed, place the plate and all in the freezer.  In a few hours you can remove the plate.  I then place the foil in a zip lock bag ready to use at a later date.


After you've followed these easy steps (exact recipe below) at any time you place the frozen filling into your favorite double pie crust recipe and bake to a glorious golden Peach Pie fresh tasting as a summer day.

Ingredients:
4-5 Cups Fresh Peaches (original recipe called for 2.5 cups but I say, why not more?)
2Tablespoons Cornstarch
2Tablespoons Tapioca
3/4 - 1 cup of sugar recommended but I add it based on peach sweetness (usually 1/2-3/4)
Dash of fresh Nutmeg
Cinnamon if desired.  I add a touch but husband not a huge fan.
Mix it all together and place in your foil lined deep dish pie plate.
When your ready to use:
Preheat oven to 450.  Place frozen peach mixture on top of your favorite crust.  Top with another crust or lattice strips.  Bake for 20 minutes.  Lower heat to 350 and bake another 30 or until lightly browned.

Recipe adapted from a recipe found on allrecipes.com

Sunday, July 21, 2013

Blackberry Lime Jam


I have ventured into a creative space with my jams this year. I think I've overcome the fears around preserving and I'm feeling a bit brave.  Preserving is such a wonderful way to share gifts that keep on giving. It is a feeling like no other when you open a jar of something you made months, the previous year, or even years before and taste all the love you put into it.  The preserves get stored on a shelf waiting for the next PB&J or fluffy buttermilk biscuit slathered with butter.  The memory of what, how, where and when get stored away with them.  Then one day you walk into the pantry and pull out a jar. POP goes the lid and all those luscious fruits and memories are there for the spreading.

So the first "creative flavor combo" for me this year, Blackberry and Lime.  I can't take credit for the idea.  I knew I had a bunch of blackberries and I wanted something a bit different so I 'Googled' . Last year I tried a Blackberry Peach recipe.  That didn't get it.  The blackberries just over powered the peaches.  I've also tried a triple berry and it was good but I wanted something unusual.  The addition of the lime adds a brightness.  You can barely detect it until you read the label and then you exclaim, "I knew I tasted something a bit different.  I think this is a keeper.  See what you think

The jam recipe is ever so basic folks.  All I do is measure 2 pounds of fruit and place it in a non metal bowl with 4-8 ounces of  sugar.  The amount of sugar depends on the sweetness of the fruit and your taste buds. Then, finely grate the rind of 1-2 limes. Stir well.  Cover the fruit, sugar and lime peel and place it in the fridge for at least 24 hours. If your schedule gets hectic I've left it there for 3 days.  Yikes you say, but it was fine.  I adore this recipe for this reason.  So often my days plans get interrupted by something going on around the farm.  I have to be flexible and this recipe flex's with me.  Actually this year the blackberries didn't seem to break down at all in 24 hours.  That's what you want, the sugar and the fruit to macerate, or break down together.

OK.  Your 2 do list is letting up a bit and you can see your way clear to get into the kitchen and finish your preserves.  Place the fruit in a non reactive pot and bring it to a simmer.  Simmer, simmer until....

Here is the secret word friends...EVAPORATION.  It might not smack you in the head the way it did me but when I read about it in Christine Ferber's  beautiful book about preserves, Mes Confitures  I was like, Dah. Of course. That's all jam and jelly making is, removing the liquid from the fruit until it concentrates. So,the days of slaving over the stove worried about the precise timing of the process are over.  I know what to look for now.  When the liquids have dissipated I know it's time for me to really participate in the process.  Don't get me wrong I do stir the mixture as it goes I just don't stress over WHEN the mixture is about to jell.  So, after the fruit starts to thicken up I add my flavors.  I added 1 Tablespoon of fresh squeezed lime juice and 1/2 to 1 teaspoon of lime zest.  Give the flavors a change to meld and then taste it.  If it needs more, go ahead but remember the flavors develop.  When it's time to check the set you may want to use a thermometer. The jam should reach 221 degrees Fahrenheit.  Another method used is a chilled plate.  
 Place some of your jam on the plate.  If a line drawn with your finger doesn't bleed, your good to go!  Now it's time to can that JAM!  

I won't spend time of the basics of canning on this blog.  Ball is an excellent site and has resources galore.  Basically fill your processed jars and process the jam in a water bath for 10 minutes but the Ball site will answer all your questions.

I am here to tell you this is another practice makes perfect story.  Each time you preserve fruit, be it jam, jelly, marmalade, chutney or whole, you will have a new experience.  The fruit will differ year to year and so will your finished product.


 I use this basic recipe for everything now.  The only thing I might change in the process is adding 1 Tablespoon of lemon juice to the macerating fruit if I want the flavor or so the fruit doesn't discolor.  When the fruit begins to thicken I add my flavors.  While surfing about the web I found a fabulous chart on Northwest Edible Life
blog that I will use as my guide  but once you get the basics the SKY'S THE LIMIT.

Thursday, July 11, 2013

Lamb Sliders


Requested again and I'm finally getting "round 2 it".  It wasn't until I saw our recipe published in another newsletter that I felt the boot in my backside.


We all have a few favorite recipes in our collection.  Why do we love one recipe over another?  Is it all about taste?  I think not. Preparation being such a huge part of the creation plays a huge role in my liking a recipe or not.  I've made a few things in my life that tasted good to me but I just didn't enjoy preparing.  If a recipe is too technical or requires too much of my attention it's usually not for me.  Like, puff pastry....why would anyone want to slave over such a process when you can buy such an excellent option as Dalfour?  I know and respect those cooks out there that love the preciseness of such an endeavor it's just not me.   Long story short, you won't find a recipe like that in my collection anywhere.
Some might argue that I love making breads, preserves, and pastries and they require thought.  RightO, but I've learned that with practice you become more adept at these and therefore less thought is required.

So, here you go.  A recipe we've served at many functions, weddings (mine included), art events and just round our table.  Hope you enjoy!
Recipe of the Week
  With summer time comes summer grilling! This week's recipe comes from Olga Elder from Stoney Mountain Farm.

Stoney Mountain Farm Lamb Sliders
1# Ground Lamb
1 link Italian sausage, casing removed
3-4 cloves garlic, grated or minced
¼ C grated onion
½ T cumin
½ t cinnamon
1 t fresh chopped cilantro or ¼ t coriander
1/8 -1/4 t hot pepper flakes
1-2T fresh parsley, chopped
1 egg
½ Cup oatmeal soaked in milk
S&P to taste
Feta or Chevre cheese 

Place all ingredients, except cheese, in a bowl and mix well (I use my hands).  The mix will seem wet.  Form into 1" balls, place on roasting rack or prepare for grill.  Flatten the patty gently, then press dime size ball of cheese into center.  Cover with just enough additional meat mixture that the cheese is sealed in.  Roast in 400 degree oven for about 10-15 minutes or starting to brown.  You can turn to broil if you like a crispier texture.  I also like to grill them.  These are also great regular burger size but the sliders are fun and trendy!
Serve in "slider" rolls now available in most groceries.  "Hawaiian Bread "Slider" rolls are a great option. I serve these with a tomato and onion relish but any one or combo of these would be great.
Experiment; there are many condiments and such that really compliment lamb!  

Tuesday, July 9, 2013

Our Little Orchard

Ah, our little orchard.  I knew when I first set foot on this farm I wanted to have a "little" orchard.  On a small scale an orchard is also referred to as a fruit garden and sounds more appropriate for our farm.  I love to eat fruit in every form, fresh in the flesh , pies, preserves, cobblers, in my pancakes, muffins, on yogurt or ice cream, and fresh in the flesh some more. My mouth waters at the thought of it. I am often reminded of a moment in my childhood some suggest should be embarrassing.  My grandmother placed a bowl of blueberries on the breakfast table.  Yes, a bowl.  I pulled the bowl in front of me, sure it was meant just for me and proceeded to pour a bit of milk.  With haste the SERVING bowl was snatched from my place mat.  Embarrassed, really?  I knew what was in that bowl.
Gosh, trees in my own back yard!  I can eat the fruit right from the branch it hangs from. What a treat.  Blackberries, blueberries, cherry, apple, pear, plum, persimmon, fig and even pecan are all here now.  We haven't gotten a harvest from each and every one yet.  The harvests of fruit will improve with age, the trees are still fairly young.  Our blackberries and raspberries provided gifts the first year and now there is enough fruit for me to really be challenged with options.  More then you can swallow in one sitting usually means your going to have to prepare them so that they don't go by way of the fruit flies. Plenty of jams and cobblers have been made from our berries already. In fact, as I write I have fruit macerating ...my first step for jams and preserves. I have journeyed through the preserving process so that I'm just getting comfortable.  Now I'm even making my own flavor combos.  Today, blackberry lime!  I have already taken some pictures of the process so you can be assured I'll share the recipes in an upcoming post.  I love, love, love to preserve stuff.  It feels so thrifty and respectful of the food.  There is nothing quite like popping the lid from a jar of preserved fruit or vegi's  you toiled over the year (or more) before.


  As our trees are maturing  each year we have a few more fruits, that is if we get there before the deer, crows, or Japanese beetles.  You'd be surprised how much we loose.  Last year we lost about 50 pears to dining crows.  We wait for the fruit to ripen, they don't!


The fruit we planted that I haven't mentioned is the fruit needing the most attention....peaches.  Of course it is the very fruit we planted the most of.  I have been guided so often on this farm by an idea I've dreamed about in the past, never really understanding what's involved.  Me, really, jumping into something blind....no.  Yep!  That's me.

For those who know our farm you know we're all about the no chemicals or pesticides way of doing things.  We follow organic practices with everything on our farm.   Ever tried to grow a peach tree?  Oh my is it a challenge....  Peaches are very susceptible to all sorts of pests and diseases and AFTER they were planted I heard folks say, "you can't grow a peach without spraying".  I don't know if you were paying attention but I am trying to tell you I was probably told  before I planted them but I didn't HEAR it until after.  Yep, I must admit...I wasn't listening.  Or, was it selective hearing.  Oh well, it wasn't intentional.  I just wanted peach trees and I didn't want to be discouraged.


Well here you have it.  Picked today from one of our peach trees.  They are some kind of yummy and I am some kind of proud.  For anyone who gardens you understand "the fruits of your labor" well this is truly "the fruits".   I wonder if the sweetness is at all influenced by the fact that we grew them right here in our own back yard.  Or, maybe the fruit is so sweet cause we did it against the odds?


I do know we can't take all the credit.  It's been a good year for our peaches.  The long season of cool temps kept the bugs at bay long enough that all the luscious fruit formed and ripened before the bugs got to it.  The reason we had no bugs this year I have figured out.  The real mystery, how did the deer and crows miss these beauties?  We're not complaining, just wiping the peach juice from our chins.

Thursday, February 7, 2013

Lovely Cup of Chai


Alright,  my blog topics are all over the place.  One theme I recognize through out my posts is reference to those little surprises in life that represent, EASY when you thought surely, HARD.  Take Chai for example.  Have you tried it?  Chai means tea in many cultures.  In this country we've come to know it as a spicy tea drink usually mixed with milk.  A combination of cardamon, ginger,cinnamon, and black pepper...how could it be wrong?  It  produces a warming, soothing effect.  I don't know if it's the spices themselves or the whole experience. I do know it gives me a sense of well being.  I can't really explain it.  I also know it's difficult to resist a second cup.  Once I discovered it I craved it. As is often the case with new love you seek it out. You go back and back to it's origins.  Then as if magic, it appears in more and more places. You can grab a cup at most coffee shops, Starbucks included.  Warm or cold whatever you fancy.   I then began to find it at various stores in those cardboard cartons they're packaging so much in now.   Take it home, add milk....ahhhhh!


I believe it was after the second carton that I realized what a rip off it was but I continued my addiction.  Let's see...the carton had about 4 servings (mugs) and cost almost $5 and you had to add your milk of choice too.  If you bought 4 tea bags you wouldn't be close.  Now mind you I'm not trying to be critical.  I know products take a lot of care to make but as is often the case you can do it a lot more economically on your own.  On top of the economics if you buy quality ingredients you'll often have a better outcome.   I know, it's only a rip off if you buy it but I was!  You can buy the spiced tea bags but somehow I still wasn't getting the same result.  Truth is, I went without my occasional fix for sometime.  Then, the other day I came across the recipe.  So, here it is....that easy, simple fast surprise recipe for Chai tea and I'm telling you it's the best I've ever had.


Chai Tea 

1 teaspoon peppercorns
8 cardamom pods
8 whole cloves
2 sticks of cinnamon
Star Anise
6 black tea bags
1 Cup of milk (almond, coconut, whole, whatever your choice)
2 Tablespoons sugar


Lightly crush your spices and place in a saucepan with 6 cups of water.  Bring your water to a boil and add the tea bags.  Remove from heat and let steep for desired amount of time.  For me it's when I got back to it. I believe it was actually several hours.  Strain the mixture and it's ready to go.  


Here's what I did.  Strained the mixture, added the almond milk (I had some left from someone's visit and it sounded like a good way to use it) and stored it, mixed in the fridge until ready to use.  When I want some I pour it into my cup and heat it, then I add the desired amount of sweet which I must admit I like.  Something about the sweetness up next to those dark, intense spices...um, um, ummmm...

I enjoy an afternoon cup of tea but somehow the spices and the milk  give you that cozy comfort that I often need in the middle of the afternoon. 


When your facing THIS...a warm cup of comfy is ALL RIGHT!


Friday, September 7, 2012

Pickles!

I don't know about you but I love pickles.  Sweet, sour, spicy, chips, spears and those almost embarrassing whole ones...hey, I'm referring to the mere size...some so big we might wonder if one person could finish them..  Actually, I love anything "pickled" but today I am writing about the cucumber sort.  I have a recipe to share with you!  Pickles, pickled by the jar!  Yep, that's right...8-10 cucumbers, depending on the size and you can have yourself a jar of fabulous pickles waiting in your larder for the day your taste buds water for the garlicky, salt and vinegar cure of that firm crisp pickle!  You know the kind?  The kind addictions are made of.  Once the  the vinegar begins to manipulate the sides of your mouth there is no turning back.  Just one, are you kidding?


On our farm the garden is mostly about our own personal consumption and I'm learning how to deal with the various phases of the bounty.  Pickles are the reason I plant cucumbers.   The smaller (under 5" long)  cuc's are good for dill pickles. As long as the cucumbers aren't bitter (not enough constant water) and not too large (over 2" in diameter) they're always good for B&B's (bread & butters for those not familiar with pickle vernacular).  In my humble opinion FRESH picked is always key when it comes to pickles!  I don't believe I have ever met a pickle aficionado that wouldn't stick their nose up at soft pickles!

Now, listen up, a few successful canning's and an expert I am, NOT!  One of the reasons I am sharing this recipe; it is so darn easy.  I promise, if you try this recipe two things will happen.  1) You won't believe how easy it is.  2) You too will feel like an expert

I am the type with BIG ideas and not always enough time, or these days, energy to get er done. So, this recipe really appealed to me.  At the end of a long day working , destroying the kitchen with canning equipment spread from one end to the other doesn't appeal to me.  Another reason I like this recipe is the ease of dealing with your daily harvest.  In most home gardens the yield  is a few a day. So, collecting the quantity of pickles needed for most other recipes can be a pain.  Since the freshness of the pick contributes to the "crisp" of the bite, if you collect over time you'll have older cucumbers too. I believe the older ones have the potential to risk the crispness factor.  Now I know some of you are wondering about those pickles resting on the grocery shelf.  Don't think about!  I wouldn't even try it.  Just buy elsewhere.  There are plenty farmers and farmers markets around these days that freshness shouldn't be an issue. When the seasons not right, don't pickle. By the way, have you seen straw bale gardening?  Cucumbers are some kind of easy to grow.  

 When I found this recipe  I was stoked.  This is my third year using this recipe and I think I've finally perfected it.  I adapted it from a recipe I found in Backhome Magazine.
First, you want to wash your cucumbers well and snip the vine end, just a snip.  I'm told if left on the cucumber it can create a bacteria in the jar that would ruin the whole batch.  I'm not going to guide you through the basics of preparing the canning jars cause it is pretty basic stuff.  You want to sterilize each jar and the lids.  Any questions check out Ball site.

Using pint or quart size jars ( better for gifting) :
Place in the bottom of the jar
1 clove of garlic
1 healthy sprig of dill
1 dried hot pepper or a shake or 2 of hot pepper flakes (optional)
Next stuff each jar with as many cucumbers as possible.  I sometimes use a wooden spoon end to manuever the cuc's to make room.  They somehow snuggle up in the space.  Leave 1/2" headroom from the top of the jar.  If you'd prefer not to leave them whole the spears also work great in this recipe.
Add:
1-1.5 Tablespoon of non-iodized salt
1/2 cup cider vinegar
Fill the rest of the jar w/ boiling water, again making sure to leave the 1/2" headroom.
Last but far from least place a fresh grape leaf on top of the jar before you seal it.  I know most of you won't have access to such a thing.  The old timers say it is the final step to assuring crispness.  Maybe a neighbor has some  grapes?  If they have grape vines, they have leaves a plenty.  Maybe it's the very thing needed to bring neighbor to neighbor?
Process in a water bath for 20 minutes.
Make sure the jars seal.
In 6-8 weeks your pickles will be ready for the tasting.  Don't dilute the experience with crackers or anything else for that matter.  You will not stop at eating one and you'll be running about the house bragging on your yummy treat.  No, me, I didn't do that.....

What comes at the end of a Blog?  Unresolved photo placement!


Friday, July 22, 2011

The Glorious Tomato


I don't imagine I've met a person that doesn't love the appearance of the gorgeous ripe summer tomato! Today's awareness of food quality has brought all garden fresh food front and center but the tomato, yes that juicy meaty tomato explained it all to me with one bite. You all know what I mean don't you? FRESH, LOCAL, Dirt still on the flesh...we get it don't we? This year for some reason I am experiencing a tomato passion...I just can't get enough of them and I cannot stop thinking about them. I am not out of the bed long that I don't start thinking of my next tomato experience. I'm sure my kitchen counter covered with varieties of all shapes and sizes doesn't help my watering mouth. From the mayo covered sandwiches that ALWAYS require a napkin, to the tomato pies, salsas and gazpacho, I have ventured into each of these categories already this year. I love to try new recipes and tomato pie recipes are the topic of the week. Already this year I have tried two new ones and still love my favorite.

My Favorite Summer Tomato Pie1 Cup chopped Basil
1 Cup Ricotta Cheese
2 Eggs, Beaten
¼ cup grated parmesan cheese
½ cup grated mozzarella

Favorite Pie Crust, I use butter/shortening and a bit of cornmeal for this recipe.
S and P to taste
Mix all ingredients and layer in bottom of your favorite unbaked pie shell. Top with fresh summer tomato slices. Bake at 350 for 30 minutes
**NOTE** Many variations of tomato pie and I have tried them all. To many I am sure the addition of mayo is essential. To me this basil/cheese combo is the perfect compliment .


Bon Appetite, August issue published a great looking alternative with a buttermilk biscuit crust...hmm, it looked good. I tried it, some of you might love it. The biscuit dough was a bit overwhelming to me and just not the right texture. I did like the layers they used and might try that in a traditional crust. To me, my basil and ricotta layer is as good as it gets. I still have a counter full and my journey will continue, especially if this heat wave continues. As the heat of July now August bears down on us and my garden is offering the most luscious rewards I am still full with the joy of summer. As the bounty keeps me creating and WORKING to keep up with supply, I know my thoughts will move longingly toward fall. I will have had enough of the weeds, the heat, and yes...the tomato. Only until they return next year. Come May next year as the flowers form on the plants, my mouth will begin to water again!


Wednesday, April 15, 2009

Lamb Meatballs

OK. I must give credit to our friend, Candace Turney ( I think her sister had something to do with it. I made them as apps. I made a variation of the tomatoe sauce for dipping and also had a yogurt sauce. They were good weren't they

4 lbs of your ground lamb2 or 3 eggs (depending upon the size)½ c oatmeal6 cloves garlic1 Tbsp ground cumin2 tsp cinnamon1 tsp ground coriander½ tsp hot pepper flakes½ c currents½ c toasted pine nuts10 -12 scallions finely chopped1 c. parsley finely choppedSalt to taste
We mixed the oatmeal with the eggs and let it soak for a bit before mixing in everything else for the meatballs.
The sauce was 2 large cans of tomatoes6 cloves garlic3 lg onions finely chopped1 cup red wine
Sauteed the onions & garlic in some olive oil then added the tomatoes & wine.
The meatballs cooked in the sauce. Towards the end we added 1 c. of spicy green olives________________________________________

Tuesday, April 14, 2009

Recipes

One of the primary reasons I am starting this Blog is for all the folks that have approached me with wonderful lamb recipes. There has been an interest in"sharing" the ideas and I too am excited to hear and try all these mouth watering food ideas folks have described to me. This last Saturday (our 2nd ) market in Durham a customer from the week prior told me about a recipe he had tried with our ground lamb. He said he made the best pizza ever. He bought frozen pizza dough from Trader Joe's, roasted vegi's and feta cheese all atop the ground lamb! Yummo! (My new phrase). Talk about quick and easy. I think I'll be heading to Trader Joes to keep some of that in the freezer...I know, pizza dough is soooo easy but what a time saver! Aftera hard day on the farm the last thing I have energy for is preparing dough!
How about adding carmelized onions?

Yum, Yum, Yummy Lamb Burgers...1# ground lamb, 1Tblsp minced fresh lavender leaves, 1Tblsp minced fresh rosemary leaves, Crumbles of Feta cheese....

Roasted Coffee Marinated Leg of Lamb:
1. S&P entire leg
2. Mix marinade:
· Coffee beans, roasted under broiler unitl crisp…be careful they burn easily.Grindcoarse,not fine, ¼ c
· Fresh Rosemary LOTS
· Coarse ground Mustard
· Very dark brewed coffee, expresso if possible
· Red wine
· Garlic, LOTS
· Olive Oil
Combine all in food processor to yield about 2C. Coat lamb w/ paste and pour liquids over. Marinade for at least 2 hours.
Grill.